We process your personal information to measure and improve our sites and service, to assist our marketing campaigns and to provide personalized content and advertising. By clicking the button on the right, you can exercise your privacy rights. For more information see our privacy notice.
Privacy Policy

How to Make a Magnetic Notepad
November 08, 2018

Notepad binding is one of my favorites! It is incredibly simple, and can be made with or without a machine. And turning a basic notepad into a magnetic one is simple as pie! Let me walk you through the 4-step process...
★ What You Need:
First, let's go over the stuff you will need to make a magnetic notepad. This will include the padding supplies as well as magnetic strips. I have separated them into required supplies and optional supplies that are helpful when making pads of paper in bulk, but not really necessary for lower volumes.
Required:
- 1. Paper -- Duh! The 1st thing you need is your paper. You can use any kind of paper or card stock you want, custom print it, or just use a pretty plain stock from a craft store.
2. Padding Glue -- Look, in all honesty, some individuals will use plain old Elmer's...but padding glue is specially formulated for the easy tear-off while still keeping every page bound strong and flexible, so I highly recommend it.
3. Clamp -- This can be as simple as several binder clips, two table clamps, or an actual padding press for higher volumes. You can also just place a heavy cast iron pan or thick books on top...anything to compress those pages tightly together.
4. Padding Brush -- You can use any padding or paint brush you can find. We recommend a 2" wide brush made of material that is easy to clean, since it will be used in glue.
5. Chip Board Backing -- This should be cut to the same size as your notepad
6. Magnetic Strips -- I recommend at least a 1/2" wide strip (or wider). Craft adhesive also typically works great.
Helpful for Larger Volumes (But Totally Optional):
- 7. Pad Counter -- This allows you to easily measure out pads from stacks of paper without having to count pages.
8. Pad Knife -- This allows you to pad bind all of your pads together, and then easily separate them into individual pads by cutting the adhesive.
★ Instructions:
Now let me walk you through the steps! I know that I said it was simple, so I hope you won't take my over-explanation as complication...I am writing this in a way that will help people who have no experience with padding. So if you already know how, go ahead and skip to step 4.
- 1. Prepare Your Pad -- Stack your pages together with the chip board sheet at the bottom. Square the stack so the pages are all flush and place the stack on a table with the binding edge handing a bit over. Then clamp your pages tightly.
2. Bind your Pages -- Now paint on a coat of padding glue to the exposed edge. One solid coat should be enough, but some users like to allow it to dry and add a second coat.
3. Wait -- Wait for the glue to dry completely. Un-clamping or handling the pad before it dries can lead to pages falling out. Depending on the glue you use and the thickness of your coat, dry time varies from 20-40 minutes. So make yourself a snack or pour yourself a glass of wine and chill for a bit.
4. Make it a Magnet -- Un-clamp your pad and add the magnet! Cut the magnet to just under the width of your sheet, peel off the liner, and stick it horizontally on the chip board backing toward the top. Now pour yourself another glass to celebrate, because you're done!

Pretty simple, right?! Whether you want to make grocery lists, tear-away daily calendars, inspirational notepads, or anything else, a magnetic pad of paper is an easy and fun way to make it! Get creative with your pages by displaying a new quote on each page with a fancy script, or create letter head pads. Sell them in your Etsy shop or at your local market, give them away as gifts, or hoard them for yourself (that's my preference, muahaha)! Make reward cards for your students, or even tear-off business cards...literally anything you can think of!
Make your paper pads even more impressive by adding some shimmery metallic foil! Check out my previous post for how to make a foil notepad here.
Want to be featured in our next blog post? Send me an email with photos of the notepads you made to mallorym@binding101.com and I will feature you and your business!

In her free time, Mallory's favorite things to do include volunteering at the animal shelter bottle feeding neonatal kittens, reading at the park, and binge streaming TV shows with her 3 furbabies and family beside her.

Hi! My name is Mallory and I have been in the industry since 2008. If you do the math, that is over 15 years. I have spent my time at Binding101 in many roles, including customer service, sales, e-commerce management, video production, and more! Because of this vast experience, I bring a truly expert touch to the content in our blog. widdling down complex topics to extract what our customers really want to know. As the Content and UX Manager, I act as a writer and editor for the majority of copy you will find here. When not at my computer, I love spending time binging stand-up comedy, baking, and cuddling up with my family and rescued cats and dogs...
Related Products

Comment(s)


Trending Now

How to Bind Paper
January 29, 2019
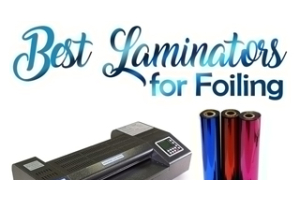
What are the Best Laminators for Foiling?
July 10, 2018
How to Make a Wire Calendar 3 Different Ways
September 04, 2018
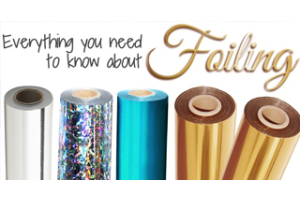
Everything you need to know about Foiling (with FAQs)
June 22, 2018
