We process your personal information to measure and improve our sites and service, to assist our marketing campaigns and to provide personalized content and advertising. By clicking the button on the right, you can exercise your privacy rights. For more information see our privacy notice.
Privacy Policy

How to Create Perfect Foam Board Display
May 09, 2018

If you have an upcoming event where attractive and professional presentation boards are needed, but don’t know how to begin, this guide will give you a starting point. No matter what the application (foam boards for trade shows or conventions, presentation boards for school seminars and presentations, or as evidence displays for the legal industry) it is important to create a professional and vibrant look that will grab the eye and keep it.
Step 1:
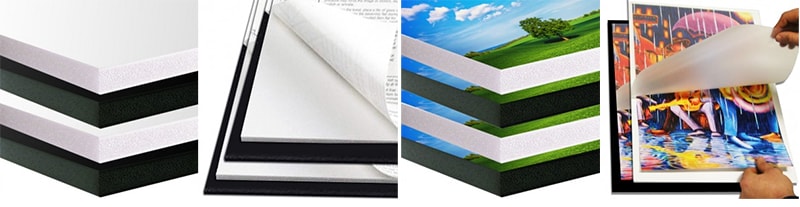
Choose your board material / make-up. The two most popular presentation boards are foam board and gator board. Foam board is the more common of the two due to the significantly lower cost. Gator board, however, is better for presentations that will be handled or shipped multiple times because they are made of a denser core for more durability, and have a stronger surface material to resist denting. It usually runs about 2-3 times more expensive than foam board, but is also 2-3 times more durable. Both foam and gator boards can be custom-cut to almost any size desired, and the print quality and adhesion of prints is the same for both. Check out this video that demonstrates foam vs. gator board under stress...
Step 2:
Choose a board coating. Within the foam and gator board categories you can select between plain, heat activated (features a heat activated adhesive on one side), self-stick (featuring a pressure sensitive adhesive on one side), or pouch boards (that include a laminating pouch on one side so you can mount/laminate in one step).
-
• Plain mounting boards offer extreme versatility as you can do anything you wish with them: custom cut, paste multiple items using standard adhesive, etc.
• Self-stick foam boards and self-stick gator boards take the hassle out of applying your own adhesive and require no expensive equipment to work. Just peel the liner, carefully apply your print or document by hand, and use a straight edge (brayer, ruler, credit card, etc) to even out the print before the adhesive settles.
• Heat activated mounting board is ideal for large format applications where the precise application of an image is needed, such as for signs. These boards require a heated laminator with the capability to accept mounting boards (be sure to check the thickness of boards your machine can accept before purchasing).
• Pouch boards let you mount and laminate in one step by sliding a print between the board and film, then feeding it through a heated pouch laminator (must accept boards). Many different laminate finishes are available so you can achieve the perfect look.
Step 3:
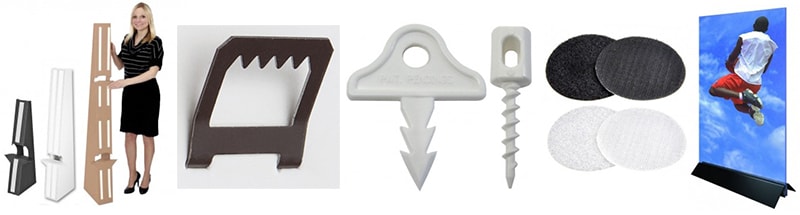
Once your prints are applied to the boards, determine how best you which to display them. Some ideas include framing, setting them on easels, mounting them to a foam board stand, hanging them to the walls or from the ceiling with foam board hangers, and even just leaning them against the wall if no other method fits your needs. There are several different foam board stands, hangers, and accessories to perfect your display so your customers see a professional and clean design.


Hi! My name is Mallory and I have been in the industry since 2008. If you do the math, that is over 15 years. I have spent my time at Binding101 in many roles, including customer service, sales, e-commerce management, video production, and more! Because of this vast experience, I bring a truly expert touch to the content in our blog. widdling down complex topics to extract what our customers really want to know. As the Content and UX Manager, I act as a writer and editor for the majority of copy you will find here. When not at my computer, I love spending time binging stand-up comedy, baking, and cuddling up with my family and rescued cats and dogs...
Related Products


Comment(s)


Trending Now

How to Bind Paper
January 29, 2019
What are the Best Laminators for Foiling?
July 10, 2018
How to Make a Wire Calendar 3 Different Ways
September 04, 2018
Everything you need to know about Foiling (with FAQs)
June 22, 2018
