We process your personal information to measure and improve our sites and service, to assist our marketing campaigns and to provide personalized content and advertising. By clicking the button on the right, you can exercise your privacy rights. For more information see our privacy notice.
Privacy Policy

C-Line Super Heavy Non-Glare Vinyl Sheet Protectors 50pk - CLI-61018
19.1
NewCondition
InStock
C-Line Super Heavy Non-Glare Vinyl Sheet Protectors 50pk - CLI-61018
We're sorry, but we no longer sell this item.
Below are a few alternative options that may be a great fit for your needs.
If not, please call us at (866) 537-2244 for personalized recommendations.


SWIPE FOR MORE IMAGES
- 0
- 1
- 2
- 3
- 4
- 5

Overview
C-Line Super Heavyweight Vinyl Sheet Protect is vinyl sheet protectors with maximum durability. It is constructed from durable and tough vinyl material designed for outstanding performance in preserving and protecting high-use presentation materials, letters and reports.
Specifications
| Item # | 11CLI61018 |
|---|---|
| Manufacturer | C-LINE Pinnacle |
| Manufacturer Item # | 61018 |
| Brand | C-LINE |
| Global Product Type | Sheet Protectors |
| Load Orientation | Top |
| Number of Holes Punched | 3 |
| Thickness/Grade | Super Heavyweight |
| Pre-Consumer Recycled Content Percent | 0 % |
| Total Recycled Content Percent | 0 % |
| Insert Size | 11 x 8 1/2 |
| Sheet Protector Type | Ring Binder |
| Material(s) | Vinyl |
| Finish | Non-glare |
| Number of Tabs | 0 |
| Post-Consumer Recycled Content Percent | 0 % |
| Quantity | 50 Per box |
Description
C-Line Super Heavyweight Vinyl Sheet Protect is vinyl sheet protectors with maximum durability. It is constructed from durable and tough vinyl material designed for outstanding performance in preserving and protecting high-use presentation materials, letters and reports. Special unique shaped corner design created to allow for quicker and easier page turning. The non-glare finish will reduces the glare from bright lighting, giving a more attractive appearance in any environment. You're certain to find a sheet protector that meets your needs, no matter what job you're trying to accomplish. C-Line's sheet protectors are available in a variety of materials and finishes and are designed to protect your documents day after day, no matter how often they're handled. Remember, with all C-Line's top loading sheet protectors-no sheet punching is necessary.
Features:
- Super Heavyweight for maximum durability
- Traditional heavy feel and rigid construction make presentations stand out
- Top loading design eliminates the need for hole punching
- Uniquely shaped corners allow for quick and easy page turning
- For 11 x 8 1/2 document storage in standard three-ring binders
Videos
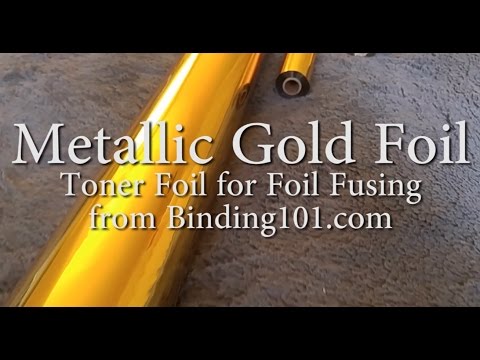
Metallic Gold Toner Foil
Transcript:
Featured in this video is our most popular toner foil color, Metallic Gold! Watch how this shimmery foil reflects and shines in the light, and see what you can do with gold toner foil in this short video.
Featured in this video is our most popular toner foil color, Metallic Gold! Watch how this shimmery foil reflects and shines in the light, and see what you can do with gold toner foil in this short video.

Gold Foil Comparison
Transcript:
In this video we show you the four different "gold" options we offer, moving it slightly in the light so that you can see the variations and how each color changes as it reflects. We offer gold metallic foil in a basic metallic gold foil, a matte gold foil for a little less shimmer, a light gold foil for a slightly brighter look, and a rose gold 70 foil that has just a hint of pink.
In this video we show you the four different "gold" options we offer, moving it slightly in the light so that you can see the variations and how each color changes as it reflects. We offer gold metallic foil in a basic metallic gold foil, a matte gold foil for a little less shimmer, a light gold foil for a slightly brighter look, and a rose gold 70 foil that has just a hint of pink.
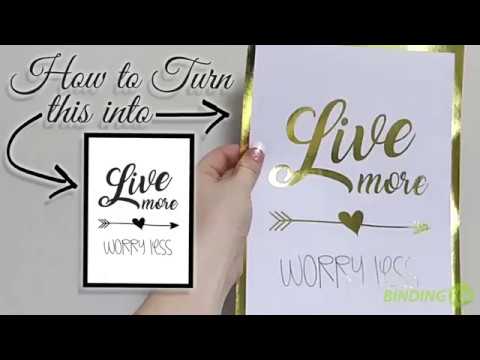
How to Foil with a Pouch Laminator
Transcript:
Hi, my name is Mallory, and today I am going to show you how to turn a printed sheet into a gorgeous foiled print using a pouch laminator.
Ok, so the first thing you need to do it print the design you want to foil. It needs to be printed using a dry toner ink onto a smooth paper stock. Thicker paper like cardstock works fine, as long as there is no texture and the ink used is a dry toner (not an inkjet or other wax-based ink).
You are also going to need a pouch carrier, which is this fold... Read More
Hi, my name is Mallory, and today I am going to show you how to turn a printed sheet into a gorgeous foiled print using a pouch laminator.
Ok, so the first thing you need to do it print the design you want to foil. It needs to be printed using a dry toner ink onto a smooth paper stock. Thicker paper like cardstock works fine, as long as there is no texture and the ink used is a dry toner (not an inkjet or other wax-based ink).
You are also going to need a pouch carrier, which is this folder here. This is going to protect your laminator.
Now place your printed sheet onto the pouch carrier, and lay your foil roll over your design. Make sure all the ink that you want to foil is covered. Next, cut your foil to fit the design.
Place the foil with the non-colored, gray side down over the portion of your design that you want to foil.
So I’ve trimmed my foil, and now I am going to place a piece of scrap paper on top of the foil to prevent it from transferring onto my carrier. If your foil overlaps your printed sheet, you can also place a piece of scrap paper below your design.
Now bring it over to your pouch laminator, which should be pre-heated. The temperature to use is going to vary quite a bit, depending on the supplies you are using, including the paper thickness, the laminator, and even the foil itself, because some colors need a little extra heat. You may need to do some testing before you can get the perfect finish, so be sure to have plenty of printed sheets to work with.
I am using the professional, James Burn SpeedyLam 330R, set to 150 degrees Celsius (or about 300 degrees Fahrenheit) using a speed setting of 2. Other laminators may work as well, but there are a couple things you need to keep in mind… they need to have adjustable heat and adjustable speed settings in order to work. They also have to hit really hot temperatures, the minimum typically being about 300 degrees Fahrenheit (but again, that will vary depending on several factors, which is why adjustable heat is necessary). It also needs to be able to handle a 10 mil thick pouch minimum, since we are using a thick pouch carrier and scrap paper.
If you’re using one of the smaller home office pouch laminators, it might still work, you may just have to run it through more than once to get the foil to stick.
So we’re going to lay our carrier flat and open it up. There may be some static, which for me lifted up my scrap paper. You can kind of see where it grabbed the design here. Now find an edge and peel it up.
This is my favorite part...Voilah! You’re done.
The color used is our regular metallic gold, which is our most popular. We have several other golds available, including matte gold and rose gold too. Plus a ton of other colors, holographic patterns, iridescent rainbow colors, and more.
You can see here that I should have placed a piece of scrap paper below my design, because my foil overlapped my print and stuck onto my pouch carrier.
Thanks so much for watching, I hope you enjoyed this video. Be sure to subscribe to our YouTube channel for more foiling videos, as well as a ton of other videos about all the products that we have to offer at Binding101.com
_____________________________________________________________
PACIFIC SUN by Nicolai Heidlas Music https://soundcloud.com/nicolai-heidlas
Creative Commons — Attribution 3.0 Unported— CC BY 3.0 http://creativecommons.org/licenses/b...
Music promoted by Audio Library https://youtu.be/kbqmEJTr3nU
Product Reviews
Write Your Own Review
Frequent Asked Questions
Submit a New Question


