We process your personal information to measure and improve our sites and service, to assist our marketing campaigns and to provide personalized content and advertising. By clicking the button on the right, you can exercise your privacy rights. For more information see our privacy notice.
Privacy Policy

GOframe 1500 Accessories & Supplies
0
0
0
GOframe 1500 Accessories & Supplies
We're sorry, but we no longer sell this item.
Below are a few alternative options that may be a great fit for your needs.
If not, please call us at (866) 537-2244 for personalized recommendations.


Brand:
GoFrame
FAQ: 2 Questions, 2 Answers
- Pair with GOframe 1500 Canvas Frame Kits
- Make professional quality wrapped canvases
- Patented corner clamps are reusable
- U-Shaped fasteners help to create neat and perfectly folded corners
Call Us
Even though we no longer offer this item, we have a full catalog of products to suit your needs!
Please call us at (866) 537-2244 to find the perfect solution.


SWIPE FOR MORE IMAGES
- 0
- 1
- 2
- 3
- 4
- 5
- 6
- 7
- 8
- 9

Overview
With the GOframe 1500 canvas stretching kits you can make your own wrapped canvases from the comfort of your home or office, without the high price of outsourcing, and without complicated tools and equipment. Perfect for gifts from individuals, or low-cost POP displays at your print shop, the 1500 stretcher bars are available in sizes from 8" to 36", so you can make any variety of canvas sizes you desire. They are also designed to allow for easy cutting, so you can even customize the print size you want. In only about 10 minutes, you can make a beautiful, professionally wrapped canvas print all on your own. Use them to create beautiful family photos, display paintings at your gallery, or to sell your beautiful photography at events. Whatever the print type and look, these canvas kits can help you create a beautiful display. They stick out 1½" from the wall for a premium look, adding texture and depth. They are made of the best grades of museum-quality North American basswood sourced from sustainable forest practice sawmills.
What you'll need to get started:- GOframe 1500 Standard Stretcher Frames in your chosen size
- Starter kit (Includes corner clamps, 4 oz. glue, & staples)
- Corner trimmer
- Your own print
Specifications
| Item # | GF1500SUP-GRP |
|---|---|
| Manufacturer | GOframe |
| Manufacturer Part Number | GF1500SUP-GRP |
| Available Supplies | Starter Kit (Includes 4 Corner Clamps, 4oz Glue, 11 Fasteners) Corner Clamps (4 Pack) Corner Trimmer and Blades 4oz Glue Bottles (4 Pack) GOclip Collage Clips (40 Pack) |
Description
Professional canvas wrapped prints for your medium to large print and fulfillment shop have never been faster or easier than with the GOframe 1500 Gallery Wraps and supplies. These unique canvas wrapping kits allow you to make premium finished graphic prints in only about 10-15 minutes, without any specialized, large, or expensive machinery. Just pair these accessories supplies with the GOframe 1500 bars of your choice and start creating beautiful, premium wrapped canvas prints quickly and efficiently. Easy, affordable, beautiful - that is the GOframe 1500 canvas stretcher bars!
GOframe 1500 Supplies & Accessories Available:
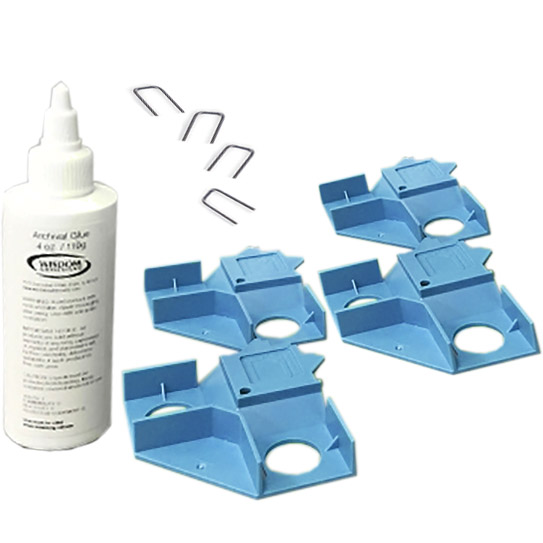
Supply Starter Kit
This starter kit includes some of the required supplies to get started making GOframe 1500 gallery wraps, such as the reusable corner clamps, some specialty glue, and fasteners for the corners.
Kit Includes:
- Corner Clamps (4 Pack)
- 4oz Glue Bottle
- Fasteners (11 Pack)
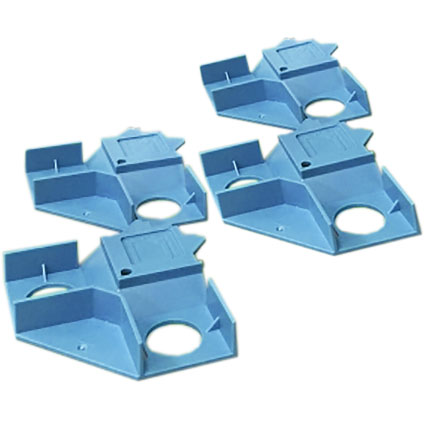
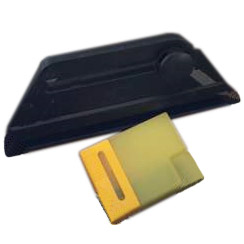
Corner Clamps (4 Pack)
This 4-pack of corner clamps is used to hold your frames in-place as you assemble them, ensuring perfectly spaced and sealed edges. They easily pop on-and-off your frames so you can reuse them over and over again.
Note: The color of these corners may vary.
Corner Trimmer with Blades
This corner trimmer was specifically designed for GOframe 1500 gallery wraps. It is small and compact, while comfortable to hold, and allows for precision trimming of the corner edges of your canvases to allow for a clean folded corner. Too much material on the corner makes them bulky and messy, so this corner trimmer is an essential tool for that professional finish. It includes the cutter itself as well as a pack of replacement blades.

Canvas Glue (4 Pack)
This specialty glue was manufactured specifically for GOframe canvas wraps. It is an archival-safe and pH neutral adhesive that won't degrade your canvas, even over time. The strong, permanent bind holds traditional canvas materials to the wooden frame with premier integrity.
4oz. Bottles
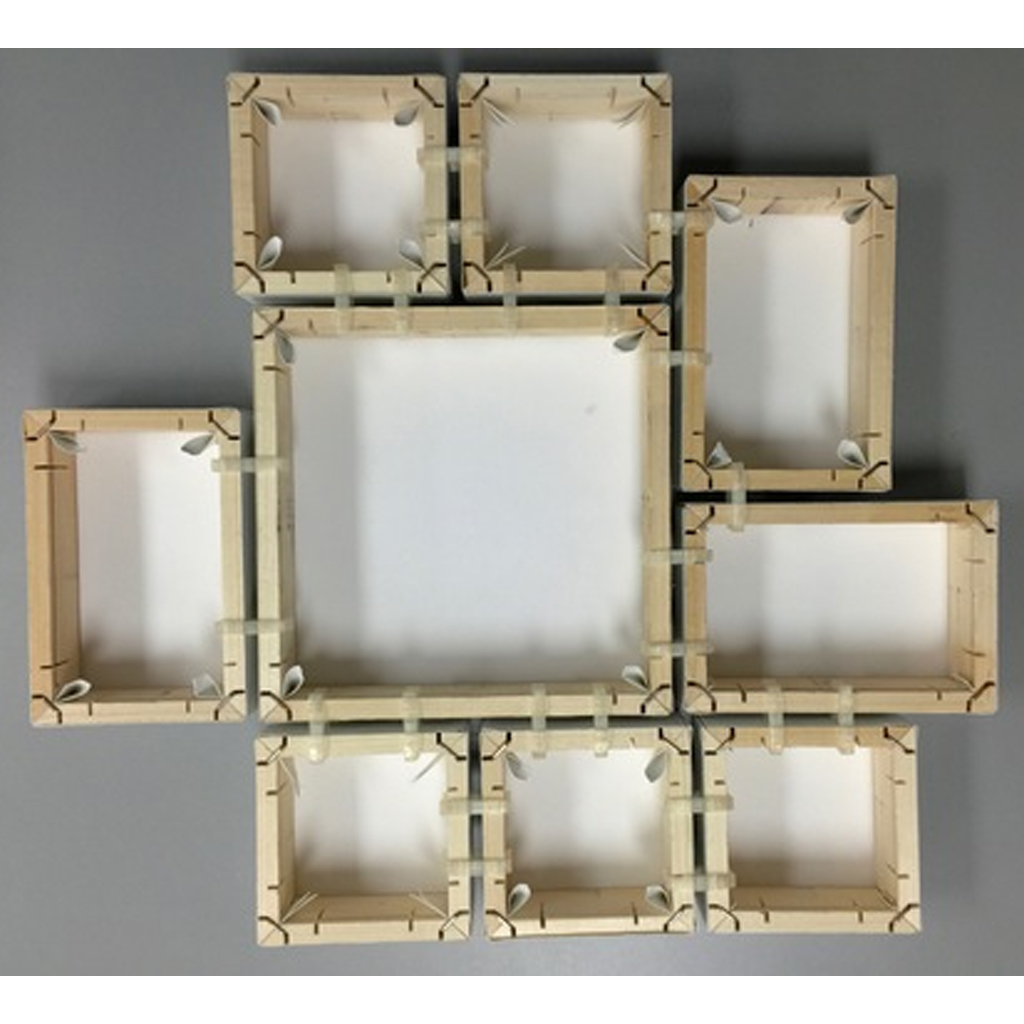
GOclip Collage Clips
Use GOframe Collage Clips with the 1500 standard system to create beautiful combinations of various wrapped prints into a collage display. They can easily be removed and added as often as you like, so you can revise your display whenever desired.
Note: Not compatible with GOframe 1500 PRO Stretcher Frames
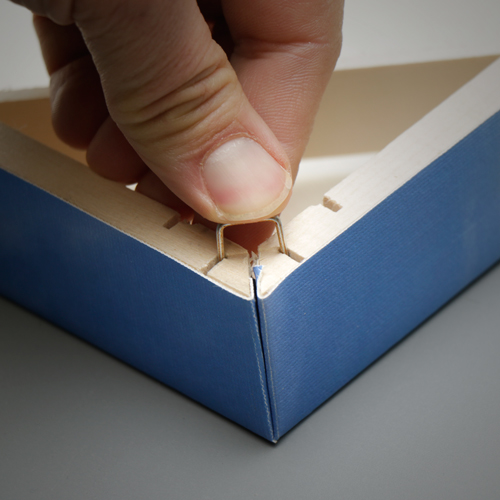
Fasteners
U-shaped fasteners are used on the corners of your GOframe 1500 to hold the pieces together.

Cotton Gloves
Cotton gloves eliminate fingerprints without leaving lint. White cotton inspector’s gloves are made from smooth, lightweight, durable, and washable 100% cotton. Protect sensitive materials including film, photos, canvas, and more.
Interchangeable from left to right.
One size fits most.

Nylon Gloves
Polygenex™ nylon gloves are thinner than most cotton gloves so you have more dexterity. Some users prefer nylon over cotton when making and handling photo products.
Interchangeable from left to right.
One size fits most.
How to Make GOframe 1500 Gallery Wraps:
- Prepare your workspace. Make sure your table is clean and free of dust and wear photo gloves. Make sure you have everything you need, including 4 bars, 4 corner clamps, glue, staples/fasteners, a handheld trimmer, and your print. Your print should be at least 2" larger than your frame on each side (left, right, top, and bottom). For example, if you're making an 8" x 8" frame, your print should be at least 12" x 12" to allow for proper wrapping.
- Peel off the liners from the bars.
- With the adhesive facing up, attach the bars to the corners, creating your frame.
- Place your print face down on your work surface, and center your frame over the print with the adhesive facing down. Once centered to your liking, press the frame down so the adhesive sticks to your print.
- While holding the bars down, remove the corner holders.
- Using your trimmer, create a 45° angle cut on all 4 corners (not flush to the bars), and then trim your print edges flush to the bars.
- Create a perpendicular cut to each of the corners (from the center, out), and fold the cut pieces over the bar.
- Beginning about 1" in from the corners, apply a line of glue along each edge of your print beside the bars.
- Two sides at a time, fold the bars up so the corners touch and secure them in place with fasteners.
- Snap-in the supports to each corner.
Tips for making a perfect Wrapped Canvas using IG Wrap Stretcher Bars:
- Start with a clean working surface to protect your canvas from scratches caused by grit and dirt.
- If you are mounting on canvas, make sure to press the bars firmly down and apply a thin bead of glue before folding up the edges. The glue works in conjunction with the adhesive tape to make a permanent stretching.
- To ensure proper adhesion across the entire bar, we recommend that after you have closed the frame you apply pressure along the outside edge by pressing firmly with your hand where the tape makes contact with the material. Please note that it can take up to 24 hours for the tape to achieve maximum adhesion.
- We recommend that liquid laminate be applied prior to mounting. If you wish to apply liquid laminate after mounting you must wait for 2 to 3 hours for the glue to set. We recommend ClearShield Type C Liquid Laminate.
- If you forget to glue you can remove the closing pins, open the frame, and apply the glue.
What's the difference between the GOframe 1500 PRO and the GOframe 1500 Standard?

GOframe 1500 Pro
- Sizes from 8” to 60”
- 7/8” Thick
- 1-1/2” Deep
- 8 bars / box (makes 2 frames)
- Tensioners & fasteners included
GOframe 1500 Standard
- Sizes from 4” to 36”
- 3/8” Thick
- 1-1/2” Deep
- 16 bars / box (makes 4 frames)
- Tensioners & fasteners included
- Can be used with optional collage clips to create perfectly spaces collages with various canvas wraps
Easily stretch your print or gallery wrap canvas with the GOframe 1500 canvas stretcher frames. Available in a range of sizes from 8" to 36", the 1500 stretchers are made from the best grades of North American basswood, sourced from sawmills that practice sustainable forestry. With museum-quality, low resin, and lignin content, the stretcher bars are stable and durable. The wood is kiln-dried to a moisture content below 8% which will ensure that there will be no warp or shrinkage after the canvas is applied to the stretching frame.
The GOframe 1500 canvas stretching kits offer professional results, without the price tag and expensive equipment. It sits about 1.5" from the wall, creating a focal point that adds texture and depth to a wall. It is the premier choice for both businesses looking to sell photographs, museums and art galleries, and even individuals for making gifts and home decor.
The GOframe is easy to assemble with the addition of the starter kit. The high-quality adhesive tape eliminates the need for pliers. The patented corner clamps are reusable and ensure that the frames will be perfectly square and prevent the adhesive tape from touching the canvas during assembly. U-Shaped staples/fasteners help to create those neat and perfectly folded corners. The tabs snap easily into place providing constant tension that creates a drum-like feel to your canvas.
Please note: Canvas material, wooden frames, and print are not included. These canvas wrap sets will work with most canvas materials, include even paper prints. We always recommend testing new materials before creating your print to be displayed. Most customers use a 300 to 450 gsm canvas material and see beautiful results. Corner clamps may vary in color.
Videos
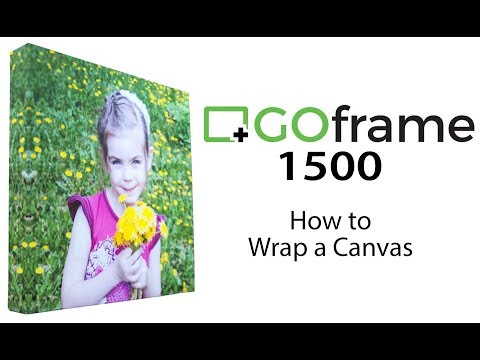
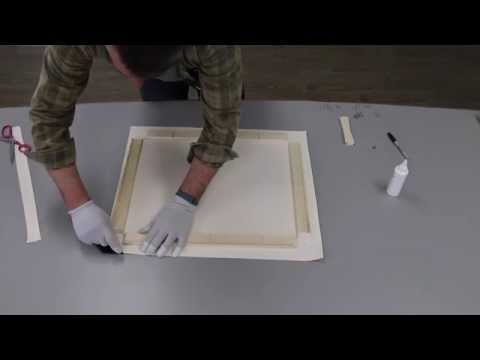
How to Make a GOframe 1500
Transcript:
To begin, gather all the components you need. Your print on canvas, GOframe 1500 Pro Bars in the correct length for your finished frame, a set of GOframe Pro Bar Corners, some corner pins and tensioning inserts, a cutting tool and a bottle of archival quality glue.
Start by removing the adhesive liner from the wide piece of tape on the front of the bar. Insert each ball into the GOframe 1500 Pro Bar Corners using the built in notches and grooves to ensure each bar lays flat.
Place your pri... Read More
Start by removing the adhesive liner from the wide piece of tape on the front of the bar. Insert each ball into the GOframe 1500 Pro Bar Corners using the built in notches and grooves to ensure each bar lays flat.
Place your pri... Read More
To begin, gather all the components you need. Your print on canvas, GOframe 1500 Pro Bars in the correct length for your finished frame, a set of GOframe Pro Bar Corners, some corner pins and tensioning inserts, a cutting tool and a bottle of archival quality glue.
Start by removing the adhesive liner from the wide piece of tape on the front of the bar. Insert each ball into the GOframe 1500 Pro Bar Corners using the built in notches and grooves to ensure each bar lays flat.
Place your print facedown on the work surface, then position your frame facedown on top. The notches around the edge of each GOframe 1500 Pro Bar Corner can be used as a guide to ensure the frame is straight. Once you are happy with the position of your frame, apply pressure to secure each bar to the back of the canvas. Remove the GOframe 1500 Pro Bar Corners and store them in a safe place for future use.
Trim around the edges to remade the access canvas, then trim diagonally across each corner. Cut into each corner at a 45 degree angle to create corner tabs. These will give a clean corner finish on your stretched canvas frame. Gently left each bar and apply a thin bead of glue down the length between the bar and the canvas. If too much glue is applied, simply wipe away the access with a clean cloth before continuing. Fold up each of the corner tabs and apply pressure to secure them to the end of each bar.
To create the edges of your finished canvas, lift the bars so that the corners meet. Using the pre-drilled holes in each bar, insert a corner pin to hold the bars in place. Finish stretching your canvas with the tensioning inserts. Simply align each insert with the grooves on the back of each bar, then apply pressure to secure in place.
Your frame is now finish, but if you desire a cleaner finish on the back, the narrower piece of tape on the top of each bar can be removed.
How to Make a GOframe 1500 without Glue
Transcript:
Start by removing the adhesive liner from the wide piece of tape on the front of the bar. Insert each bar into the GOframe 1500 Pro Bar Corners, using the built-in notches and grooves to ensure each bar lays flat.
To assist in aligning your canvas frame, we recommend marking each corner point. This can be done by holding your canvas print up to the light and placing a small pencil mark at each corner where the edge effect on your print meets the original image. These will be the corners of yo... Read More
To assist in aligning your canvas frame, we recommend marking each corner point. This can be done by holding your canvas print up to the light and placing a small pencil mark at each corner where the edge effect on your print meets the original image. These will be the corners of yo... Read More
Start by removing the adhesive liner from the wide piece of tape on the front of the bar. Insert each bar into the GOframe 1500 Pro Bar Corners, using the built-in notches and grooves to ensure each bar lays flat.
To assist in aligning your canvas frame, we recommend marking each corner point. This can be done by holding your canvas print up to the light and placing a small pencil mark at each corner where the edge effect on your print meets the original image. These will be the corners of your finished canvas. Position your canvas frame face down on the back of your print and place the small holes in the GOframe 1500 Pro Bar Corners over the pencil marks. Ensure that you are happy with the position of your frame. Then apply pressure to each bar to secure it to the back of your canvas. Use the GOframe 1500 Pro Bar Corners as a guide to cut a diagonal line across each corner of your frame.
Then use the internal guide on the GOframe 1500 Pro Bar Corners to make a small cut into each corner of your canvas print. This will create the tabs needed for a clean corner finish on your stretch canvas. Remove the GOframe 1500 Pro Bar Corners and store them in a safe place for future use.
Next, remove the release liner from the narrow piece of tape on the top of each bar. Lift each edge of the canvas to wrap the bar. Apply pressure to secure it in place. Trim off the excess canvas from the edge of your frame by gently folding the print back down onto the work surface. Use the edge of the wooden bar as a guide to ensure you make a straight cut.
Fold up each of the corner tabs and apply pressure to secure them to the end of each bar. To create the edges of your finished canvas, lift the bars so that the corners meet. Insert the corner pin to hold the bars in place. Do this by using the ends of the pin to find the hole in the wooden bar and then apply pressure to pierce the canvas. Finish your frame by using the tensioning inserts. Simply align each insert with the grooves on the back of each bar, then apply pressure to secure in place.
How to Make a GOframe 1500 without Trimming
Transcript:
Goframe system demonstration of how to wrap a canvas without having to trim to the edges of the print first. Though the print in the video has the image wrapped around the side, this is most useful when you want the edges to be blank.
Goframe system demonstration of how to wrap a canvas without having to trim to the edges of the print first. Though the print in the video has the image wrapped around the side, this is most useful when you want the edges to be blank.
Product Reviews
Write Your Own Review
Frequent Asked Questions
Q
Do some fasteners come with the Go Frame bars when I buy those? They were in my last box but I want to be sure I don't need to buy some separate.
Asked by Gabrielle
A
Hello Gabrielle. Yes, the u-shaped fasteners are included with the GOframe 1500 bars. Extras are also available in the starter kit.
Answer by Binding101
Q
Do I have to use corner clamps?
Asked by Tom
A
Hi Tom. Yes, the corner clamps are required for assembling GOframe 1500 canvas stretchers. They are reusable and only used during assembly, so the 4-pack is popped on while you are making your frame, and off once you are done so you can use them to build the next frame.
Answer by Binding101
Submit a New Question


