We process your personal information to measure and improve our sites and service, to assist our marketing campaigns and to provide personalized content and advertising. By clicking the button on the right, you can exercise your privacy rights. For more information see our privacy notice.
Privacy Policy

4 Factors that Affect Stitching Wire Quality
March 07, 2019
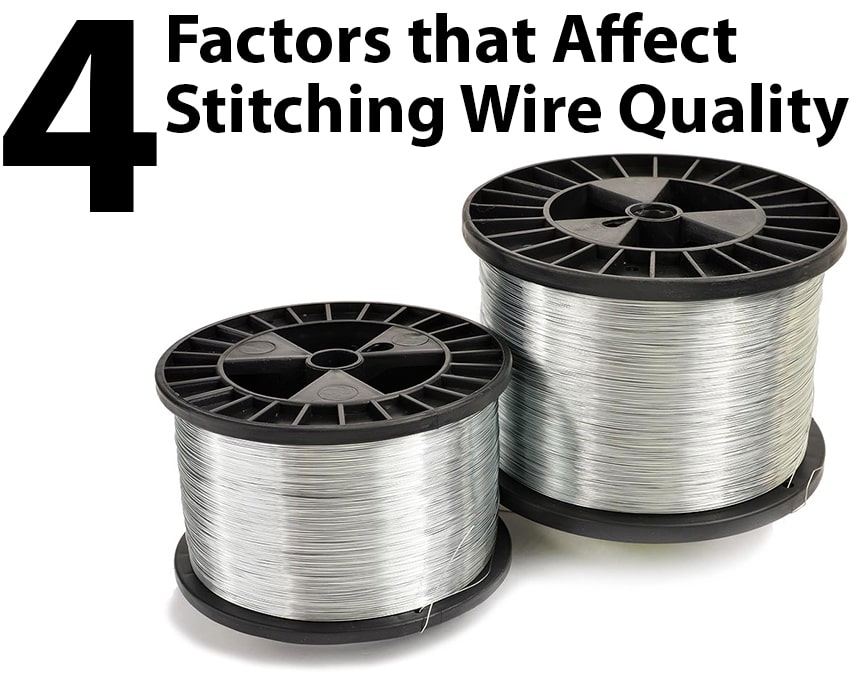
When it comes to saddle stitching, there are several factors that can effect the final stitch quality. And stitch quality is important, both for the presentation factor as well as for safety to ensure no users get stuck with the sharp ends. But first, a quick overview of saddle stitching...
Commercial printing is probably the most popular industry that uses saddle stitching as a way to bind pages together. Also called stitch binding, spine-stapling, or staple binding, saddle stitching uses a spool of stitching wire that is sewn and cut into the spine of a folded booklet using a saddle stitching machine. Used for magazines, catalogs, booklet making, and so much more, saddle stitching has evolved through the years into a staple (pun intended) in the printing world.
There are four different factors that can affect your final stitch quality. Whether you are new to saddle stitching, or you have been doing it for years and are encountering some problems, this list will help you either be prepared for potential problems or troubleshoot the issue you may already be experiencing.
Factor #1: Type of Stitching Wire
Most print shops will use a chrome-finish stitching wire made of galvanized metal wire. These wires are often coated with a special friction-reducing additive that prevents peeling and flaking while making it run smoothly through your machine for seamless binding. This also helps with proper forming and bending of the wire into the finished 'staple' shape. Some machines can also handle nylon coated stitching wire (colored stitch wire), and tin wire. But not all machines can handle all types of wire, so be sure you are using a wire style that is compatible with your specific stitcher. You can check your machine user manual for the kind of compatible wires.
Factor #2: Tensile
Tensile refers to the pull that is required to break the wire from the spool, and is measures in PSI (pounds per square inch). The tensile of your stitching wire is an indicator if its quality and, generally, a higher tensile strength indicates a higher quality wire. But you don't want it to be too high, as it can wear out your machine pre-maturely. Most top-quality wires will have a tensile strength that ranges somewhere between 130,000 to 165,000 PSI. Tensile below this range mean the wire is too soft and may not properly form into a stitch, while tensile above are too hard and can damage your machine. So make sure your supplies fall somewhere within that range for the best quality stitching wire.
Factor #3: Helix
'Helix' refers to the natural curve of the wire as it is unwound from the spool. Because the wire is wrapped around a round spool, it has a natural curve to it when it is unwound as well. This radial curve is called the 'cast' and is measured as the diameter free turn of the wire. The axial component of the helix is called the 'camber' and is measured at the ends of the free-hanging wire.
Well that's a bit confusing, huh? The important thing to take from this is the ideal cast:camber ratio of your helix. What you should look for is a large cast and small camber combination for a high quality wire. This will lead to a smoother run through your stitching machine head as it will produce less drag and less mis-stitches or dropped stitches.
Factor #4: Wire Path
The path of your stitching wire is a critical component. An improper path can lead to scratching and chipping of your wire, as well as prematurely worn out parts on your stitcher. To keep your path clean, you need to ensure there are no flat spots on your guides and that your felt pad wiping system is clean.
For more information or a quote, call us at
(866) 537-2244
or email
info@buy101.com


Hi! My name is Mallory and I have been in the industry since 2008. If you do the math, that is over 15 years. I have spent my time at Binding101 in many roles, including customer service, sales, e-commerce management, video production, and more! Because of this vast experience, I bring a truly expert touch to the content in our blog. widdling down complex topics to extract what our customers really want to know. As the Content and UX Manager, I act as a writer and editor for the majority of copy you will find here. When not at my computer, I love spending time binging stand-up comedy, baking, and cuddling up with my family and rescued cats and dogs...
Related Products

Comment(s)


Trending Now

How to Bind Paper
January 29, 2019
What are the Best Laminators for Foiling?
July 10, 2018
How to Make a Wire Calendar 3 Different Ways
September 04, 2018
Everything you need to know about Foiling (with FAQs)
June 22, 2018
