We process your personal information to measure and improve our sites and service, to assist our marketing campaigns and to provide personalized content and advertising. By clicking the button on the right, you can exercise your privacy rights. For more information see our privacy notice.
Privacy Policy

How to Make a GBC Plastic Comb Calendar
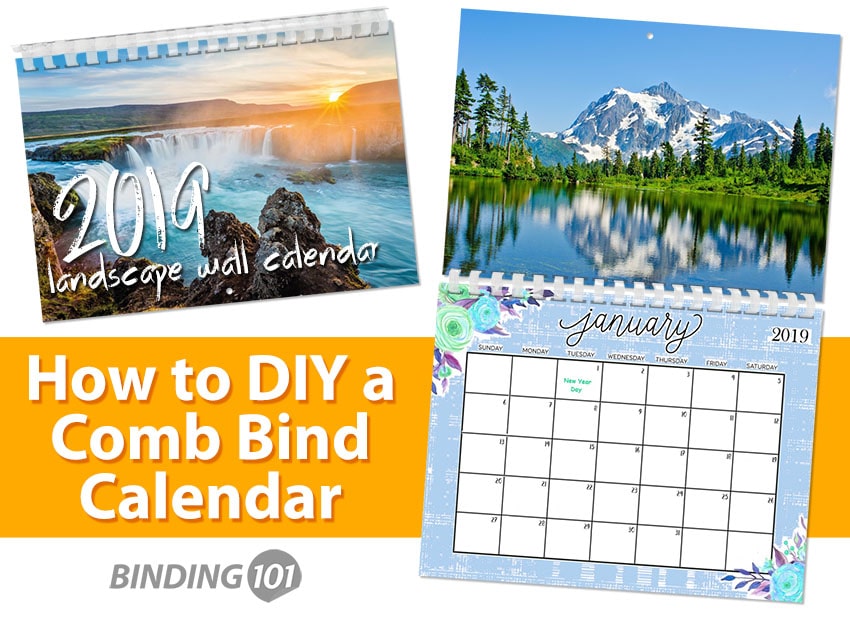
Making a calendar with a GBC binding comb is easy! Your calendar can hang on the wall in a portrait style that remains open (i.e. it doesn't flip around). This means that you should print a pretty image, quote, or whatever else you want on the backside of every calendar page, as it will show up as the top panel of your calendar, while the bottom panel is the actual calendar. All you need to DIY these comb calendars this is your comb binding machine and a few pieces of supplies. They are fun, can get as creative as you want, and are simple....in fact, the steps involved are the same steps you use to bind a standard comb document, except with small addition.
Comb Binding Calendars:
In this comb calendar tutorial, we will you walk you through exactly what you need, and each of the steps you can use to bind your calendar. We also have "tips" along the way to help solve some hiccups some users might encounter along the way.
What You Need:
- • Comb Binding Machine
• Comp Opener (Usually attached to the comb binding machine, but also available as a separate unit)
• Comb Binding Supplies
• A small hole punch (or paper drill with a small-hole drill bit)
• Your Custom Printed Sheets
• Scissors (Optional for Smaller Calendars)
How to Make a Comb Bind Calendar:
-
1) Print your Calendar: Get creative and design / print out your calendar pages. They should be printed front-and-back, since one side of your page will always be visible once the calendar is hung up on the wall. You can use any number of calendar templates available on the web, or even just make your own. TIP: If you;re making a small calendar, you can also cut your comb spine down to size with scissors.
2) Punch your Pages: Place your pages into your comb binding machine to punch them. Make sure to line them up with your paper guides so every page will be consistent. TIP: The number of sheets you can punch at one time will vary depending on the machine you are using. Remember to never punch more than the recommended capacity, and to adjust your capacity for thicker paper stocks. Doing otherwise can damage your machine, and won't produce a clean punch.
3) Punch your Hanging Hole: Now you need to punch a hole at the bottom of every page to allow for hanging. There are paper drills that can be purchased with small-hole drill bits for the pinhole style, or you can just use any hole punch you want for hanging. TIP: If you have a higher capacity drill that will easily go through your entire calendar, you can also do this as your last step so you don't have to deal with the alignment being exact on every page.
4) Bind your Calendar: Now that your calendar pages are printed and prepped, arrange the pages in your desired order, and place a comb spine into your comb opener. Most calendars will be 12-15 pages, so the smallest 1/4" comb should work well for more calendars. Pull the handle to open the combs enough to place your sheets onto the comb. Then release the handle back to close the comb. Simple! TIP: Made a mistake? No problem! Combs can be re-opened and edited as many times as you need.
And that's all there is to it! In just a couple of minutes and with just a few simple steps you can bind awesome DIY GBC comb calendars. Ready to start? Click those links in the "what you need" section to shop those individual products, or call us at (866) 537-2244 for help.


Hi! My name is Mallory and I have been in the industry since 2008. If you do the math, that is over 15 years. I have spent my time at Binding101 in many roles, including customer service, sales, e-commerce management, video production, and more! Because of this vast experience, I bring a truly expert touch to the content in our blog. widdling down complex topics to extract what our customers really want to know. As the Content and UX Manager, I act as a writer and editor for the majority of copy you will find here. When not at my computer, I love spending time binging stand-up comedy, baking, and cuddling up with my family and rescued cats and dogs...
Related Products


Comment(s)


Trending Now

How to Bind Paper
January 29, 2019
What are the Best Laminators for Foiling?
July 10, 2018
How to Make a Wire Calendar 3 Different Ways
September 04, 2018
Everything you need to know about Foiling (with FAQs)
June 22, 2018
