We process your personal information to measure and improve our sites and service, to assist our marketing campaigns and to provide personalized content and advertising. By clicking the button on the right, you can exercise your privacy rights. For more information see our privacy notice.
Privacy Policy

Adjustable Work Table for ClipsShop CSTIDY Grommet Presses
1011.91
NewCondition
InStock
Adjustable Work Table for ClipsShop CSTIDY Grommet Presses


SWIPE FOR MORE IMAGES
- 0
- 1
- 2
- 3
- 4
- 5
- 6

Overview
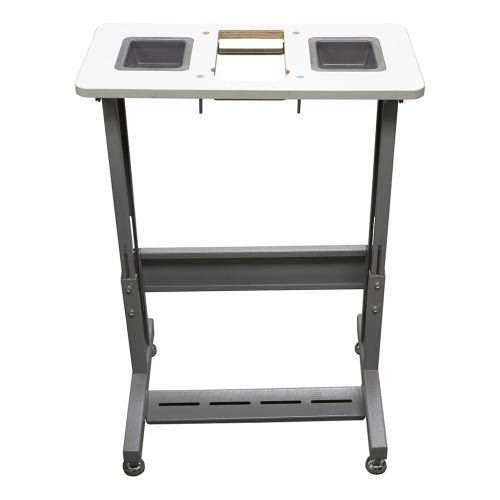
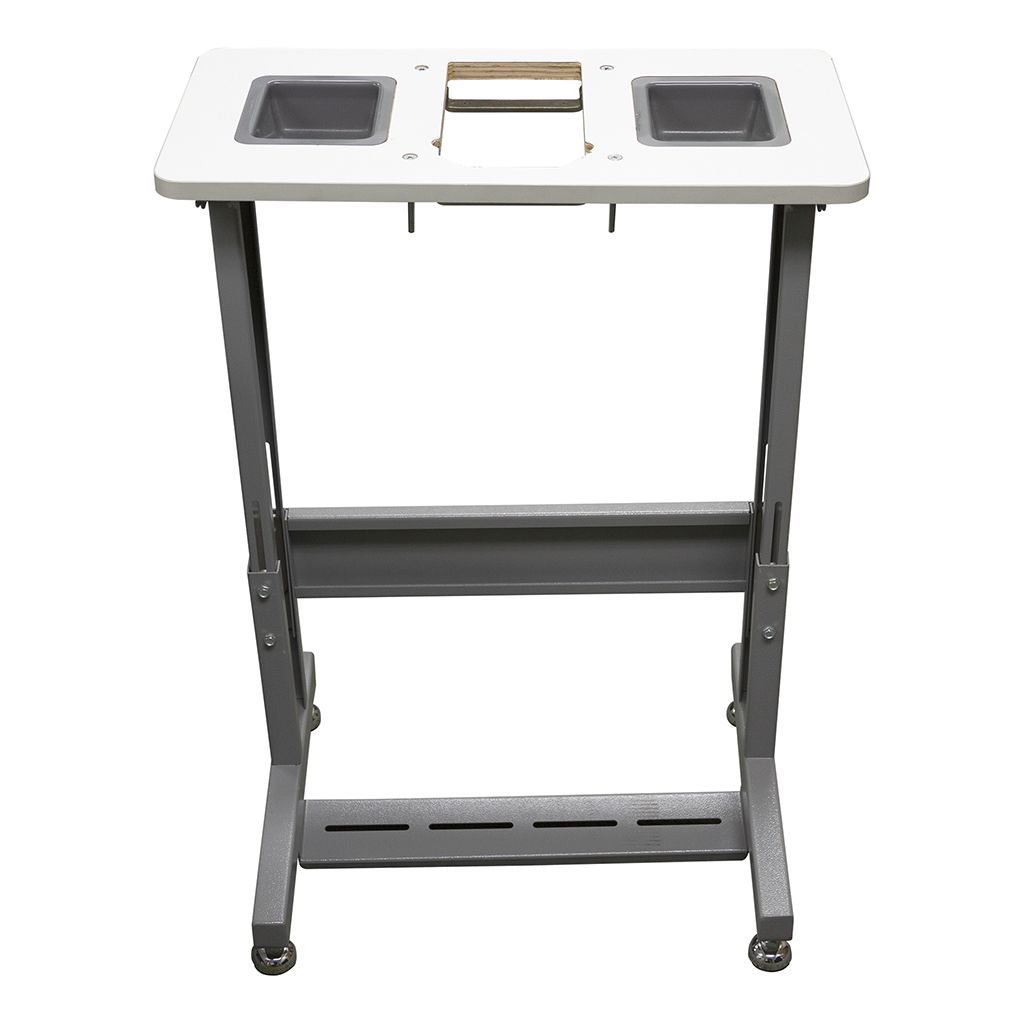
This Adjustable Work Table for ClipsShop CSTIDY Grommet Presses is designed to securely carry ClipsShop CSTIDY-41 or ClipsShop CSTIDY-51 grommet press and create a compact and convenient workstation that makes grommeting easier. A recessed table surface securely mounts and keeps the grommet press in place, it can be adjusted in 4 different set depths.
Specifications
| Item # | 04GRCSTIDY41AWT |
|---|---|
| Manufacturer | ClipsShop |
| Manufacturer Part Number | 8680211760508 |
| Dimensions | Overall: 23 ¾" W x 11 ¾" D x 25"-33" H Table Surface: 23 ¾" W x 11 ¾" D Containers: 4" W x 4 ¾" L x 1 ¾" D Footprint: 23 ¾" W x 11 ¾" |
| Assembly Required | Yes [Tools Not Included] |
| Tools Needed for Assembly | Screwdriver (Phillips), Crescent Wrench (12mm), Crescent Wrench (17mm) |
| Compatible Equipment | ClipsShop CSTIDY-41 Grommet Press ClipsShop CSTIDY-51 Grommet Press |
| Product Weight (lbs) | 27.5 |
| Shipping Weight (lbs) | 30 |
Description
This Adjustable Work Table for ClipsShop CSTIDY Grommet Presses is designed to securely carry ClipsShop CSTIDY-41 or ClipsShop CSTIDY-51 grommet press and create a compact and convenient workstation that makes grommeting easier. A recessed table surface securely mounts and keeps the grommet press in place, it can be adjusted in 4 different set depths. Setting the grommet surface of the machine level to the tabletop offers the easiest and smoothest movement of materials through the process. The height of the table can be set between 25" to 33" depending on the operator's comfort. Storage containers keep supplies within reach. For foot pedal users, the table comes with a mount for the foot pedal that can be positioned anywhere on the base bar for left, right, or center use.
Videos
How To Use Glue Dots® Adhesives The NEW Way to Glue™
Transcript:
Glue Dots are easy to use. Simply unwind the paper liner to expose the glue dot. Press the item onto the glue dot, peel away and apply. Glue Dots bond instantly and are completely mess free. Glue Dots on sheets come in a convenient, easy-to-store, resealable pouch. Simply tear the sheet at the perforation – the clear liner allows for perfect placement every time. Then apply, and press into place. Avoid touching Glue Dots, as dust and oil will compromise the bond.
You can also apply one, or mo... Read More
You can also apply one, or mo... Read More
Glue Dots are easy to use. Simply unwind the paper liner to expose the glue dot. Press the item onto the glue dot, peel away and apply. Glue Dots bond instantly and are completely mess free. Glue Dots on sheets come in a convenient, easy-to-store, resealable pouch. Simply tear the sheet at the perforation – the clear liner allows for perfect placement every time. Then apply, and press into place. Avoid touching Glue Dots, as dust and oil will compromise the bond.
You can also apply one, or more, Glue Dots, quickly and easily with the glue dots dispenser. Simply press the nose roller firmly onto the surface and pull to apply. To apply a single dot, use the indexing wheel, located on the side of the dispenser. Turn the wheel until a Glue Dot appears on the nose, then apply.
Glue Lines are the perfect adhesive for bonding ribbon, borders or anything with a straight edge. Using a non-stick scissors, cut the Glue Line to the desired length. Press firmly onto the surface and remove the liner. One inch lines are measured on a perforated liner. Simply tear at the perforation, apply the line and press onto the surface.
Glue Dots are perfect for all types of arts and crafts where the applying the adhesive requires precision and delicacy.
Product Reviews
Write Your Own Review
Resources
Frequent Asked Questions
Submit a New Question


