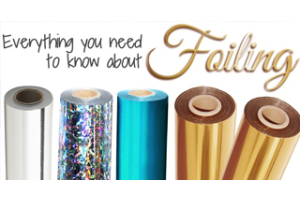
How to Make a Wire Calendar 3 Different Ways
If you've been wondering how people make those gorgeous wire-bound calendars, then wonder no-more! This DIY wire calendar tutorial will walk you through the simple steps to make a wire bound calendar three different ways. Along the way, look for "tips" to help solve some hiccups or offer creative alternative along the way.
First, there are three basic kinds of wire calendars you can make, and they are all bound the same way, they just have a few different steps each in addition to the binding that makes them unique. Here are the three kinds of wire binding calendars:
- • Hanging Wire Calendar (Flip)
• Pushpin Hanging Wire Calendar (Double Sheet)
• Tent Wire Calendar (or Stand-Up Desk Calendar)
Hanging Flip Wire Calendars:
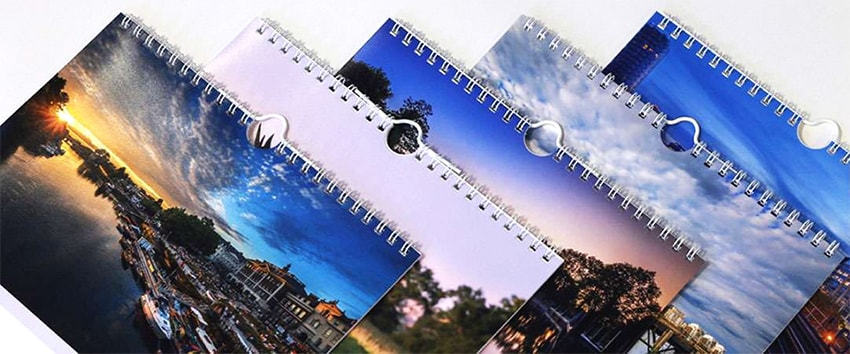
A hanging calendar is... well, a calendar that you can hang up on the wall. This wall calendar style is probably the most popular kind of wire bound calendar, which is why we will walk you through it first. It will use a combination of a standard wire binding spine, along with a calendar hanger (or hook) that lets you hang it on a nail in the wall. It will allow your pages to flip all the way around so they are back-to-back, which means they will take up less space on the wall. This is most valuable when there are no graphics or photos (or perhaps graphics that you want to give the user the ability to hide) are not on the calendar.
What You Need:
- • Wire-O Binding Machine
• Wire Closer (Often attached to the wire binding machine, or available as a separate unit)
• Thumb Cut Punch
• Wire Hangers
• Wire-O Binding Supplies
• Your Custom Printed Sheets
• Wire Cutters
How to Make a Flip Hanging Wire Calendar:
-
1) Print your Calendar: Since you will be cutting your wire to-size, you can use any number of calendar templates available on the web, or even just make your own. Here is a link to some Microsoft calendar templates to give you some ideas.
2) Punch your Pages: Position the paper guide on your binding machine based on your desired paper size. Gather your printed sheets and insert the allotted amount of paper into the opening. When the paper is fully inserted, slide the stack to the left until it makes contact with the paper guide. To make sure all of the edges of the sheets are flush, tap the right and top of the stack. Press the foot pedal or pull the handle to punch the sheets. TIP: Remember to never punch more than the recommended capacity, and to adjust your capacity for thicker paper stocks.
3) Prepare your Pages for Binding: Arrange your sheets in the desired order. Flip the back cover so that it is on the front of the arrangement. The inside of your back cover should now be the first sheet in your arrangement. You will see in later steps that this will hide the wire spine, making the appearance more professional.
4) Cut Wire to-Size: Cut and remove the center two loops of your Wire-O binding spine using your wire cutters, creating two pieces of wire. This creates a gap that is necessary for the wire hanger to be inserted. TIP: You can create a wider gap than 2 loops if you want to, just make sure your calendar hook is long enough to accommodate.
5) Punch your Half-Hole: Using the thumb cut punch, punch the half circle in your pages, centered where you cut out the wire.
6) Bind your Calendar: Insert the two pieces of wire into your punched paper. Center the wire hanger inside the wire spine, making sure that the wire hanger loop is placed in the gab of the paper and wire. Set your wire closer to the appropriate Wire-O size that you are using. Carefully place your paper on the wire closer table, with the open portion of the wire pressed against the back of the wire closer. Pull the wire closer handle to close and secure the wire around you calendar. Flip the top sheet (your back cover) to the back of the calendar to hide the spine and see your completed calendar. TIP: Most calendars are 12-15 pages, and will use a 1/4" wire-o size n a 3:1 pitch. But you can use the capacity chart here to help determine the best size based on your stack thickness.
Pushpin Hanging Calendars (Double Sheet Calendars):
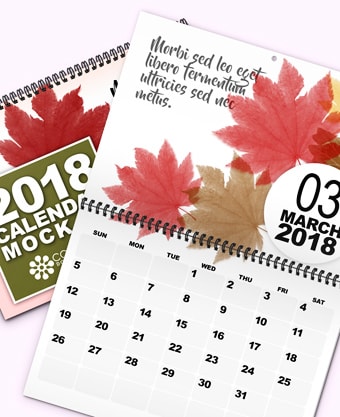
Sometimes called a double sheet calendar, a pushpin calendar is basically just a wire bound book that has calendar pages with a hole punched at the bottom of the pages. This hole allows it to be hung up on the wall with a push pin or nail. Once hung up, both of the inner pages will be visible at all times; kind of like a traditional stapled calendar (hence the name "double sheet"). Binding a double sheet wire calendar requires less supplies than a flip-style hanging calendar, but requires an additional "punch" to create that small, single hole.
What You Need:
- • Wire-O Binding Machine
• Wire Closer (Often attached to the wire binding machine, or available as a separate unit)
• Single Hole Punch/Drill with small hole
• Wire-O Binding Supplies
• Your Custom Printed Sheets
• Wire Cutters (Optional)
How to Make a Pushpin Hanging Wire Calendar:
-
1) Print your Calendar: Make your calendar pages any size you wish, keeping in mind that the larger the pages, the heavier they will be. Make sure to leave some space on the bottom of your pages for a hanging hole. Your pages should be printed front and back, since two pages (the back of one, and the front of the next page) will be visible once hung up. TIP: If you are making an extra large calendar, you may want to use two holes for hanging for additional support.
2) Punch & Prepare your Pages: Follow steps 2 and 3 from above to punch your pages and prepare them for binding.
3) Cut Wire to-Size: This step is only needed if you are making a calendar size that a standard wire does not fit for. Cut it to match the width of your paper.
4) Punch your Hanging Hole: Using your paper drill or small single-hole punch, create a hole in all of the pages (including covers) centered at the bottom.
5) Bind your Calendar: Set your wire closer to the appropriate Wire-O size that you are using and insert your wire spine into the punched holes on your stack. Carefully place your paper on the wire closer table, with the open portion of the wire pressed against the back of the wire closer. Pull the wire closer handle to close and secure the wire around you calendar. Flip the top sheet (your back cover) to the back of the calendar to hide the spine and see your completed calendar.
Tent Wire Calendars (Stand-Up Desk Calendars):
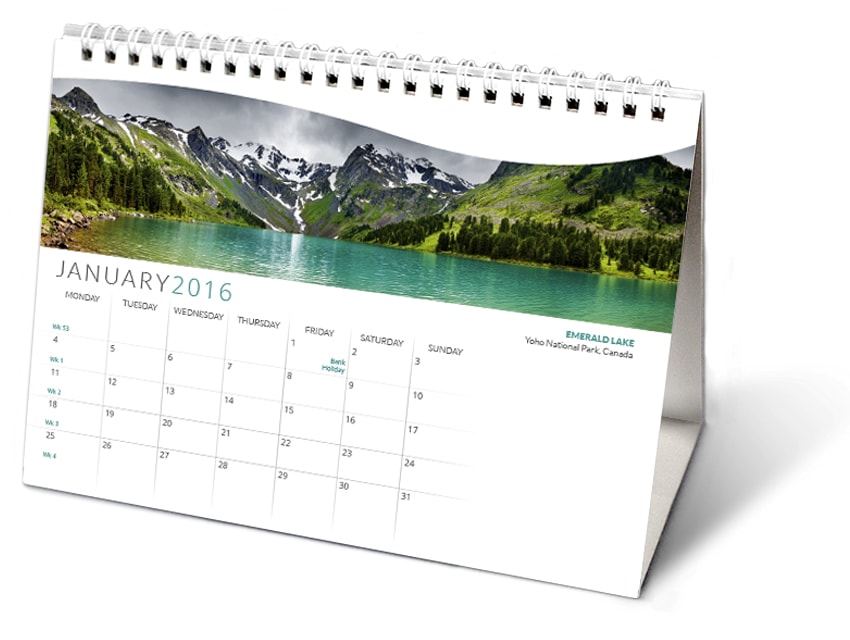
This style is a tabletop calendar option, kind of like an easel. You basically bind your calendar like a normal bound book, but you have a pre-creased cardstock cover that, when folded out, lets your calendar stand up. These easel calendars are usually a smaller size to fit on a desk without being too obtrusive.
What You Need:
- • Wire-O Binding Machine
• Wire Closer (Often attached to the wire binding machine, or available as a separate unit)
• Wire-O Binding Supplies
• Creasing or Scoring Machine
• Your Custom Printed Sheets and Creased-Cover (Calendar Base)
• Wire Cutters
How to Make a Stand-Up Wire Calendar:
-
1) Print your Calendar: Make your calendar pages any size you wish. Typically desk calendars are fairly small so they fit easily and don't take up too much space. Only 1 page will be visible at a time, so if you want to use an image, make sure to put it on the same page and side as your actual calendar page.
2) Prepare the Calendar Base: Your card stock base needs to be sturdy enough that it will not break down with the weight of the pages. The size should be two times your sheet height plus some extra space so the finished calendar pages don't touch your desk, as well as enough room that it can stand up and not flop over. Most users will add an additional 1/2" for the spacing, (which leaves about 1/4" between the bottom of the pages and the bottom of the base/desk) plus about 4" for the stability (but this will depend on your calendar size...a smaller calendar can use less, whereas a larger one may need more). It should also be a bit wider than your pages. For example, if you are using 6" W x 4" H calendar pages, your base will be 6-1/4" W x 12-1/4" H. Crease your cover at the 1/4" mark on both sides, and then once again in the center of these two creases - 3 total creases are needed. Then fold at the creases so that the edges of your base are lined up for punching.
3) Punch & Prepare your Pages: Follow steps 2 and 3 from above to punch your pages and prepare them for binding. Note that your base should be the last page in your arrangement to hide the spine. Depending on your punch machine and how thick your base paperstock is, you may need to punch 1 side of your base at a time. But note that both sides should be punched.
4) Cut Wire to-Size: Cut the wire spine to match the width of your stack.
5) Bind your Calendar: Set your wire closer to the appropriate Wire-O size that you are using and insert your wire spine into the punched holes on your stack. Carefully place your paper on the wire closer table, with the open portion of the wire pressed against the back of the wire closer. Pull the wire closer handle to close and secure the wire around you calendar. And you're done! Stand that calendar up on your desk for a flip-chart calendar display.
 About the Author • Mallory Morsa is the product expert and content specialist at Binding101, and has been a valued team member since 2008. She started her career here in customer service, moved onto sales supervisor, product management, and then onto content. She takes a hands-on approach to products, and truly gets to know how every item works before she writes about them, with a goal to give you all of the honest information you need to make a confident buying decision. She has a bachelor's degree with a focus on management and marketing, and has been a writer, photographer, and videographer for many years. In her free time, she loves to read by the pool, volunteer at the local animal shelter in the kitten nursery, and snuggle her three furbabies while she binge watches Netflix.

Hi! My name is Mallory and I have been in the industry since 2008. If you do the math, that is over 15 years. I have spent my time at Binding101 in many roles, including customer service, sales, e-commerce management, video production, and more! Because of this vast experience, I bring a truly expert touch to the content in our blog. widdling down complex topics to extract what our customers really want to know. As the Content and UX Manager, I act as a writer and editor for the majority of copy you will find here. When not at my computer, I love spending time binging stand-up comedy, baking, and cuddling up with my family and rescued cats and dogs...